
Since the aim was to speed the movement of troops, the Stanegate road ran along the river valleys, avoiding the hills wherever possible, and was dominated by higher country to the north. So it was decided to construct the permanent barrier a mile or so in that direction, taking advantage of the long ridge of folded volcanic rock known as the Whin Sill. In places, there are steep faces up to 60 metres high on the northern side and the passes through it are easy to control. The chosen line involved a number of river crossings but Roman soldiers were experts at building bridges The Stanegate was still useful for moving troops and supplies therefore it was decided to use the existing forts as permanent bases for the troops who were to defend it.
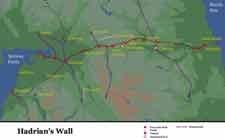
The Hadrianic Wall began at the Pons Aelius (modern Newcastle) where a new bridge named after the emperor had just been built across the Tyne. From there it follows a low ridge north of the river to Chesters, where it crosses the Northern Tyne, and then along the line of the Whin Sill. In general it keeps to the high ground and, after crossing the Irthing at Castlesteads, runs parallel to the north bank of the river all the way to Stanwix (Carlisle). From the River Eden, it follows the south shore of the Solway Firth for 14 miles, ending at the Irish Sea near Bowness. The total distance of the original plan was 111 kilometres or some 76 Roman miles.
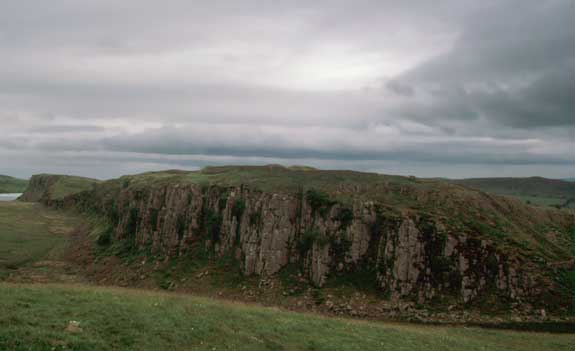
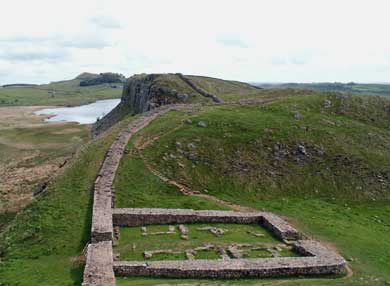
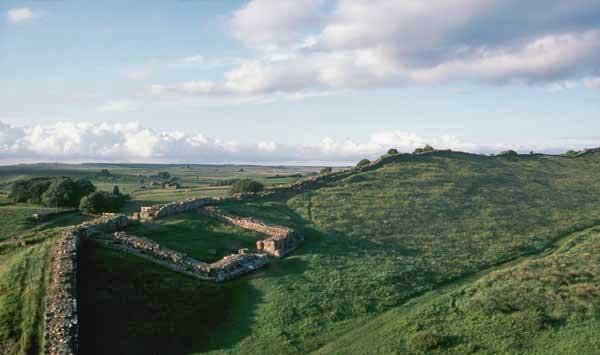
Northern face of the Peel Crags with the Wall running along the crest
Construction
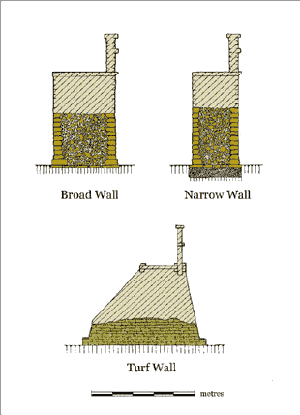
The first version of the Wall was built using two principal types of material. There was to be a stone wall running from Newcastle to the crossing of the river Irthing some 45 miles to the west near Castlesteads. Then a turf wall continued the line to Bowness. It was most likely the local availability of suitable building materials that determined the result. At one mile intervals, small  fortlets known as “milecastles” were built on the inside face of the wall. Between each pair of these were two equally spaced towers or turrets which also faced inwards.
According to surviving building records and inscriptions, the Wall was built in sections, each the responsibility of one of the three legions (II Augusta, VI Victrix and XX Valeria Victrix). Archaeologically this can be seen in the differences in plan among the various mile castles and turrets. Each legion would do a 5-6 mile stretch of wall and then move to a new 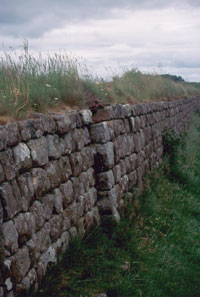 location—at some points the slightly offset join where two work parties met can still be seen (right). Although the stone wall was apparently intended to be 3 metres thick throughout its length (judging from the stone foundations), this often was not the case and long stretches are on a narrower gauge (about 2 metres or less). The reasons for this change in plan are not clear—perhaps the extra thickness was deemed excessive for the amount of work required. The milecastles and turrets were clearly built first because in many instances they were provided with a projecting stub of the wider gauge bonded to the narrower gauge of the Wall. The turf section of the Wall was on a much broader base (6 metres), with milecastles and turrets built of stone— eventually the whole system was rebuilt in stone. Where practicable a ditch ran in front of the curtain wall-but often the ground was too hard or the slope sufficiently steep to render one unnecessary
The stone walls themselves were well-built, with a rubble core between facings of dressed stone set in lime mortar. Although nowhere do the walls survive to their full height, the evidence (from preserved stretches of stairways; etc.) suggests that the rampart was 3½ to 4 metres high. There was undoubtedly a stone parapet wall, of the type depicted in contemporary illustrations, with crenellations at the top along with a walkway. The turf sections of the wall were thicker because of the nature of the material which was simply cut pieces of turf, stacked neatly on top of the cobblestone foundations. This was the material normally used by soldiers to construct their marching camps and forts. In fact, some of the features of the Hadrianic forts—the rounded corners and internal towers—are more appropriate to turf than to stone.
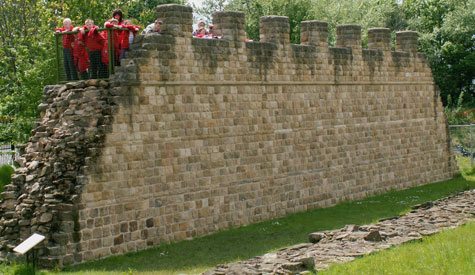
Reconstructed Wall at Wallsend
Bridges
In order to complete the defences, three major bridges had to be built over intervening rivers. These were at Willowford, Chesters and Carlisle and traces of their abutments remain. Roman engineers built bridges from one end of their empire to the other, and they built them to last. Many, such as the one at Cordoba (below), which has Roman foundations at any rate, are still used today.
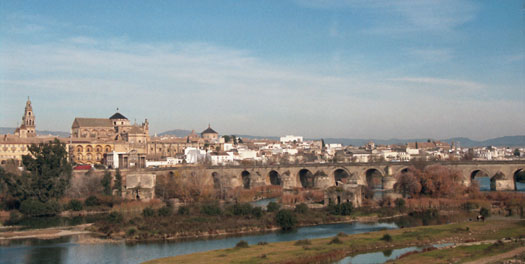
The Roman Bridge at Cordoba
The bridge at Chesters carried the Wall over the river Tyne on a series of eight closely spaced piers. The piers supported vaults and were 3 metres across, the same gauge as the wall foundations, indicating that there was probably a parapet and walkway at the top. At Willowford, where the Wall crossed the Irthing, a single large abutment (right) survives to a height of a few courses suggesting a similar but shorter bridge which had been remodelled on at least two subsequent occasions. Virtually nothing remains of the bridge over the Eden River at Carlisle, however.
Milecastles & Turrets
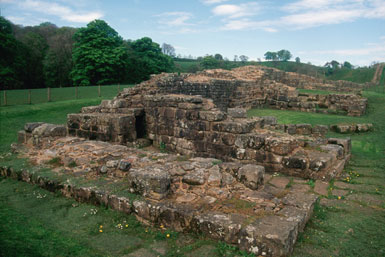
At intervals of one Roman mile, a series of small fortlets were built to house the troops that were assigned the duty of patrolling that particular stretch of wall and, in most cases, to serve as a gateways for local traffic. The stone versions measured about 15 x 18 metres while the turf ones were somewhat larger.
Mile castle at Cawfields
Each milecastle contained one or two stone or timber barracks-the number and size depending on the strength of the unit manning them, which could range anywhere from about 15 to 35 dozen men. There was also an oven, usually in the northwest corner and a staircase to give access to the ramparts. It is assumed that there was a tower above the gate but, since none of them have survived higher than a few courses of masonry, it is impossible to prove. All of the mile castles were rectangular in shape with rounded corners. 
Some of them have their long axis running away from the Wall while others run parallel to it, reflecting the preferences of different legions involved in the work. This probably also accounts for the slight differences in the construction of the gates-two sets of doors in each gate or one.
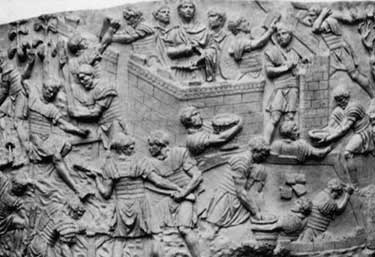
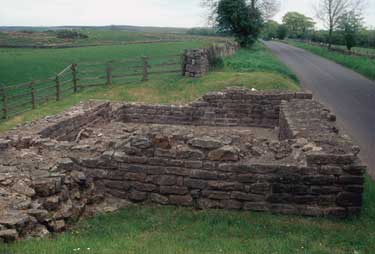
The turrets, such as the one at Peel Crags shown left, all of which were made out of stone, are very much smaller than the mile castles. They were about 6 metres square and were set about 2 metres into the thickness of the Wall. There were no proper accommodations, only a staircase leading to the ramparts. Traces of hearths and cooking pots have been found, however, indicating that some home comforts were provided. In some cases the staircases were made out of stone but in others they must have been timber since no trace has survived. The Rudge Cup, which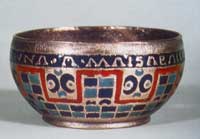 commemorates the Wall, appears to depict turrets two storeys high with a crenellated parapet at the top (right). It is shown outlined against a red background in the illustration below. A height of about 8½ metres for the turrets would probably not be far off the mark and would provide sentries with a good, uninterrupted view to the north.
The Purpose of the Wall
The Wall was probably begun in AD 122, the year of Hadrian’s tour of inspection, and completed within a couple of years. According to the ancient sources, it was designed by the emperor to serve as a barrier, separating Romans from barbarians but the evidence on the ground shows that things were not quite that simple. For one thing, it cut across the territory of the Brigantes, a tribe subject to Rome, so it did not mark the limits of Roman control. They maintained a network of outposts and forts north of the Wall. In addition, they maintained a number of outposts north of the Wall at Birrens, Netherby and Bewcastle (see map)—a dedication to the goddess Brigantia was found at Birrens, suggesting it was within tribal territory.
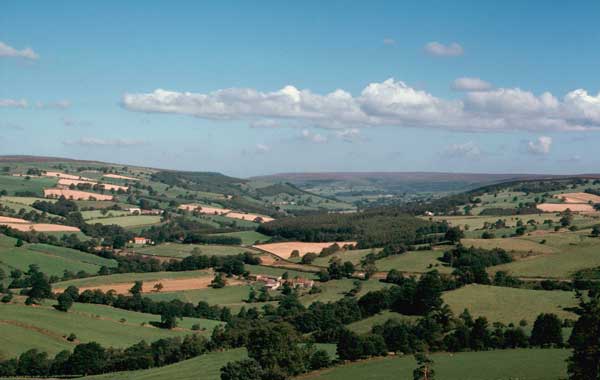
View north from Corbridge
For a barrier, it was fairly open with gates every mile, which allowed the locals to move easily back and forth—as long as they were not bent on cattle-raiding or some such. Their movements were monitored, however, as they moved through the checkpoints, paying whatever tolls or duties were required. If large bodies of hostiles gathered beyond the Wall, patrols from the mile castles and the forts to the north should have picked up intelligence of it and raised the alert. Should the tribesmen approach the Wall, their movements would be observed from the turrets which also served as signal towers to call up reinforcements. However, the earliest garrisons of the forts are a mix of infantry and cavalry so it is clear that military thinking was more offensive than defensive. The intention was to move their forces north of the Wall and confront any invaders before they reached it.
The Wall would not have been very effective as a fighting platform since, allowing for the thickness of the parapet wall, the walkway would have been too narrow to allow soldiers to freely move behind one another and the only access points would have been from the turrets and milecastles, which were about 500 metres apart. The turrets and milecastles are set behind the Wall, making them useless for enfilading fire. It is only much later, in the fourth century AD, that a ‘Maginot’ mentality set in and the defences become static.
Another factor that cannot be overlooked is the propaganda value of such an enormous undertaking. The local tribes must have been awestruck by the apparent power and might of Rome. In addition, morale among the troops must have risen when they saw the care with which the emperor, an old soldier himself, looked after their security and comfort.
The Cumbrian Shore
The system was continued (but without the Wall) on the Cumbrian coast, south of the Solway Firth for a at least another 26 miles (41 kilometres). There were small ‘Mile fortlets’ every mile with a pair of turrets in between-evidently to prevent unauthorized landings by sea. The fortlets had turf ramparts and, with one larger exception, were about the same size as the ones on the Wall. The barracks buildings and gate tower were made of timber but the intervening turrets or watchtowers were of stone. Forts existed at Maryport and Beckfoot, which were about 10 kilometres apart on the coast, and at Bowness, at the western terminus of the Wall (see map). Observation and monitoring of traffic across Solway Firth seems to have been the main function of the troops manning these posts. Determined sea borne invaders could easily sail south to circumvent the defences.
